Showing posts with label How to Make. Show all posts

Friday, 11 October 2013

Mary Berry’s Lemon Cheesecake on a Ginger Crust- Guest Post by Hannah Wood :-) [HOW TO MAKE]


Date:

Background: Any shift Hannah and I work together usually has a period of time dedicated to chatting about pudding, baking, Mary Berry or Paul Hollywood (The Silver Fox). So whenever Hannah tells me about a delicious pudding/cake/dessert she has made, I always ask her if she would like to write a guest blog post! And I must admit, I really really want to eat this cheesecake!!

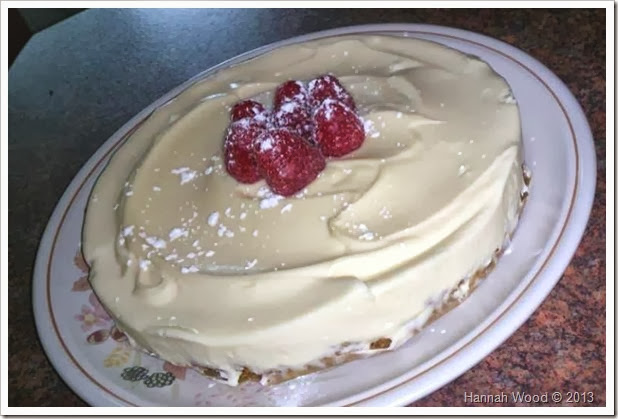
What: Lemon Cheesecake on a Ginger Crust

Ingredients:

  • 100 grams Gingernut Biscuits
  • 50 grams Butter melted
  • 500 grams Mascarpone Cheese
  • 325 grams Lemon Curd
  • 1 Lemon juice
  • Blueberries fresh for decorating
  • Raspberries fresh for decorating

Method:

  1. Grease and base line with parchment a 20cm loose bottom cake tin.
  2. Crush biscuits and Mix with the butter in a bowl, then press into the base of the tin (but not up the sides)
  3. Put the mascarpone, lemon curd, and lemon juice in a bowl and beat with a spatula until smooth.
  4. Spoon on to the biscuit base and level the top.
  5. Chill in the fridge for at least 4 hours and up to 24 hours to firm up. To serve, remove the cheesecake from the tin, peel off the baking parchement, and arrange on a platter. Decorate with the fruit and dust with icing sugar.

What was Good: It's incredibly easy to make and tastes amazing

What was Bad: I would definitely use more biscuits because I like a thicker base Winking smile

Would I Make It Again: Definitely make again!

Waffle-O-Meter:

WAFFLEWAFFLEWAFFLEWAFFLEWAFFLE half

1371520_10151730744191840_1006367203_n

Tuesday, 17 September 2013

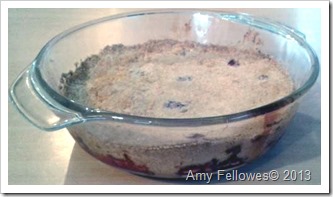
Blackberry and Apple Crumble. For the Win!!!! [How To Make]


Date: 17/9/2013

Background: I was dawdling around Tesco the other day and saw some Blackberries for sale for only £1. The first thing I thought about was… CRUMBLE! So here we are.

What: Apple and Blackberry Crumble

Ingredients:1292003_10151931234842774_1250053172_n

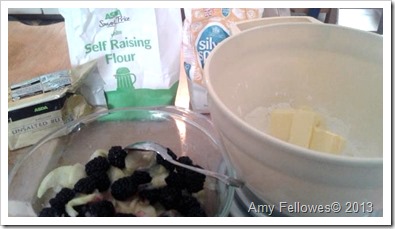
  • 1 Bramley (Cooking) Apple
  • 100g punnet of Blackberries
  • 100g Caster Sugar
  • 1 tbsp Lemon Juice
  • 100g Self Raising Flour
  • 50g Unsalted Butter
  • 1/2 tsp Cinnamon

Method:

  1. Preheat oven to 190C
  2. Peel and core a Bramley Apple, and cut into slices
  3. Place in the bottom of a (microwavable) Pyrex serving dish
  4. Drizzle with the lemon juice to prevent discolouration of the fruit, and sprinkle with 25g of the Caster Sugar
  5. Microwave for 2minutes at full power
  6. Drain the liquid from the apple
  7. Add the blackberries to the warm, soft apple and gently stir to incorporate, being careful not to break apart the fruit
  8. In a separate bowl, gently rub together the cold butter to the flour and cinnamon, to create a crumb texture. Cold hands and cold butter are essential to prevent the butter melting!
  9. Stir in the sugar to the crumb mixture
  10. Pour the crumble topping over the fruit and gently compress
  11. Bake in a preheated oven for 30-40mins or until the crumble is golden brown
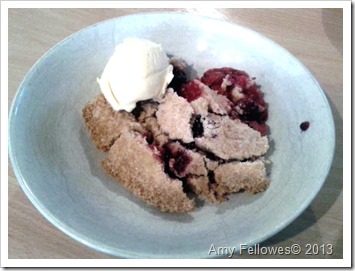
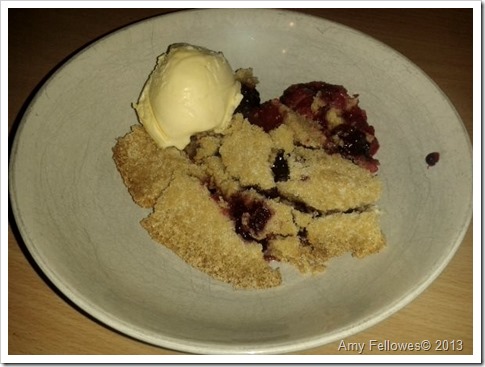
  12. Serve warm with cream/ice cream

1370371_10151931386392774_779501666_n

What was Good: Winter is heeeeeerreeeee! This means roast dinners and hot crumbly delicious puddings! The blackberries added a tangy sour edge to counteract the sweetness of the apple and biscuity goodness of the crumble. I added the cinnamon to pair deliciously with the apples. Because after all who doesn’t love apple and cinnamon!? But as I am sure you have gathered if you have read my blog before, my FAVOURITE combination is HOT and COLD! The hot soft fruit slowly melts the vanilla ice cream, and the delicious dessert fills up your tummy and makes you feel enveloped in a warm hug!

What was Bad: This pudding went down so well with my parents and I, genuinely 1278437_10151931378267774_2105346313_nthink that there was nothing I would do to improve it. My mum said that she the only improvement would be there be more of it!

Would I Make Them Again: Yes I would. You can never go wrong with a crumble.

Waffle-O-Meter:

WAFFLEWAFFLEWAFFLEWAFFLE

1278530_10151931386327774_369149959_n

Saturday, 29 June 2013

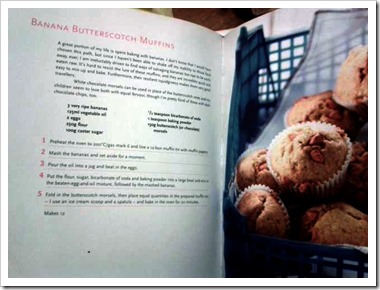
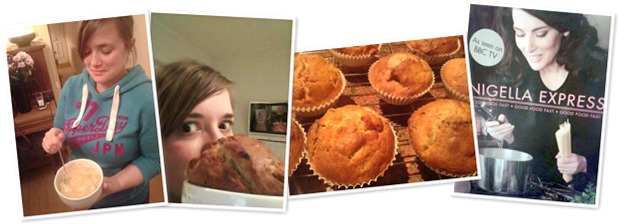
Nigella Express: Banana Butterscotch Muffins (But Actually Dark Chocolate): [How To Make]


Date: 27/6/13

Background: We had some over ripe banana’s left over and so basically I decided rather than bin them or let my housemate have them with custard (I feel unhappy about this) I thought I would make some delicious variations on Nigella’s Banana Butterscotch Muffin recipe. PLUS I haven’t done a ‘How-To-Make’ blog post in ages!

What: Banana and Chocolate Muffins

Ingredients:1062743_10151760439862774_1658292174_n

  • 3 over ripe bananas
  • 150mls vegetable oil
  • 250g self raising flour
  • 100g caster sugar
  • 1 tsp baking powder
  • 1/2 tsp bicarbonate of soda
  • 150g dark chocolate chunks (or Nigella suggests butterscotch morsels)
  • 2 eggs

Method:

  1. Preheat oven to 200C
  2. Mash the bananas in a bowl
  3. Mix together the oil and eggs and combine with the mashed banana
  4. Sift the flour, bicarb and baking powder
  5. Combine the wet and dry ingredients
  6. Break the chocolate into little morsel sized pieces (or used ready made chunks) – I used a broken bar of dark chocolate and this meant a variety of sized chunks within the muffins
  7. Add the chocolate to the muffin mix
  8. Prepare a muffin tin and line with muffin cases
  9. Using a dessert spoon/ice cream scoop, fill the cases with the mix
  10. Heat in a preheated oven, 200C for 20mins, or until a cocktail stick/skewer comes out clean

What Was Good: How easy they were to make! I literally made them and baked them in half an hour! So speedy, so easy and If you are careful not much washing up either! And my goodness they tasted delicious! Warm they oozed melted chocolate and the cake was soft, light and fluffy, but if you had enough patience and willpower to let them cool down, and even better, wait over night, they develop their banana flavour even more and are just as tasty! And I bet they are even more versatile! Nigella recommends using butterscotch pieces which I think would be very tasty as well! Another bonus is that you will probably have all the ingredients in the store cupboard anyway! So you can whip them up at a moments notice!

What Was Bad: Not even a criticism, but I plan on making them again (and again and again) but adding some chopped pecans as well for added flavour and texture! Oh and the mixture when you are making it does not look very appetising… But the finished product is divine Winking smile

Would I Make Them Again: I am already planning to make them again this week Winking smile

Waffle-O-Meter:

WAFFLEWAFFLEWAFFLEWAFFLEWAFFLE half


Reference: Lawson, N (2009) Nigella Express. Chatto & Windus. I do not stake claims to this recipe I am merely reviewing it Smile

Friday, 14 December 2012

Chocolate Chip Brioche Bread and Butter Pudding with Nutella®


Date: 14/12/12

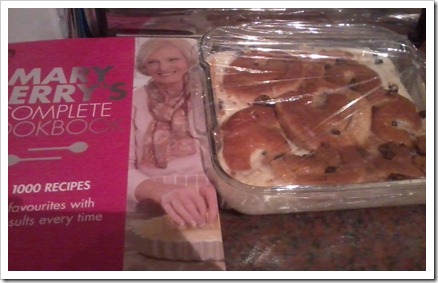
Background: Basically, because I cannot get back to Rugby for Christmas Day, my parents decided to come up to Brum to visit, and to deliver and return presents for extended family, friends and loved ones. I cooked them a yummy Roast Chicken Dinner, and to accompany it, a very Winter Warming dessert. The general principle is from the delightful Mary Berry, but the additions and adjustments are my own Smile.

What: Chocolate Chip Brioche Bread and Butter Pudding with Nutella®


Ingredients:

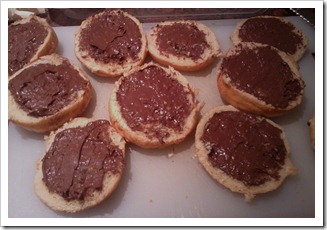
  • 6 Chocolate Chip Brioche buns2012-12-14 16.00.56
  • 2 tbsp. Nutella®
  • Handful/30g dried mixed fruit
  • 2 eggs
  • 600mls milk
  • Half tsp. Cinnamon
  • Butter for greasing
  • Ice cream/Cream to serve

Method:

  1. Pre heat oven to 200C, Gas Mark 5
  2. Grease a 10inch/Equivalent ovenproof dish with butter
  3. Slice each Brioche bun horizontally in half
  4. Melt the Nutella® in the microwave for 10secs to make it easy to spread
  5. Spread a thin layer of Nutella® onto each brioche bun half
  6. Layer the bun bases onto the bottom of the dish, Nutella® side up
  7. Top the bun bases with the Brioche tops, Nutella® side down, slightly off centre to the bases, so that all gaps to the dish are covered
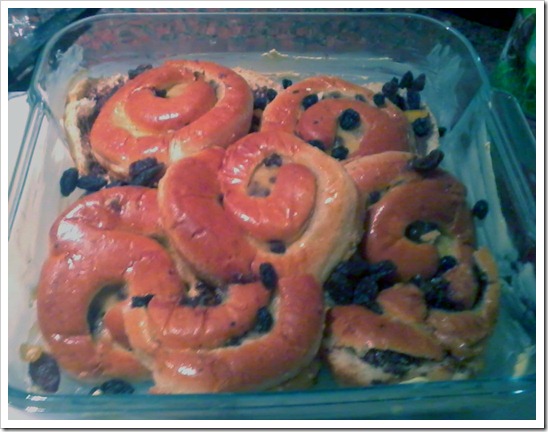
  8. In between the layers and on top, scatter the mixed fruit2012-12-14 16.22.54
  9. Mix together the eggs and milk
  10. Pour the custard mixture over the Brioche buns
  11. Sprinkle the cinnamon of the top of the pudding and leave to stand for at least an hour to allow the bread to soak up some of the custard mixture
  12. Cook in the pre-heated oven for 40minutes, or until the pudding is golden on top, and the custard mixture is set completely
  13. Serve immediately with cream/ice cream


What was Good: Oh my days. It was so satisfying and warm! With the weather being anywhere between –4 and 6C, a cockle-warming dessert is just what the metaphorical doctor ordered! I am not normally a massive bread and butter fan, but with the flavour of the warm brioche, and melted Nutella®, oozing throughout the pudding, this was a definite winner for me. Served with the cold ice cream, the hot and cold combo was as always a box ticker in my eyes! The fruit was a bread and butter pudding must have, and because they had had around 2 hours to soak up the custard mixture, they had become plump and juicy. It was also surprisingly light, it was not overly cloy-y and it did not stick to my stomach lining like some traditional puds. I would happily make this dessert again, and I look forward to eating the cold left overs tomorrow!

What was Bad: There is something about the texture of a bread and butter pudding that does not float my boat… But the flavour of this particular confection made it a winner despite this!

Would I Make It Again?: Yes I would!

Waffle-O-Meter:

WAFFLEWAFFLEWAFFLEWAFFLE

2012-12-14 16.09.15

Reference:

Berry, M (2012) Mary Berry’s Complete Cookbook. 3rd ed. London: Covent Garden Books. P399

Saturday, 24 November 2012

Mary Berry’s Christmassy Mincemeat Buns! [How to Make]


Date: 24/11/12

Background: Ever since Stacey bought me Mary Berry’s Complete Cookbook, I have had a hankering to make something from within it’s glistening shimmering colourful pages. So with the Christmas Spirit ebbing towards us like a cheerful festive fog, I decided to make Mincemeat Buns, a recipe encompassing that Crimbo-In-A-Jar wonder, mincemeat, if you hadn’t already guessed.

What: Mincemeat Buns


Ingredients:

  • 375g (12oz) Mincemeat
  • 250g (8oz) Currants (I used mixed fruit)
  • 2 eggs
  • 150g (5oz) Caster Sugar
  • 150g (5oz) Soft Butter or Margarine
  • 250g (8oz) Self Raising Flour
  • 32 cake cases (Or in my video, 12 silicone cake cases and a sandwich tin!)

Method:

  1. Measure out all the ingredients into one bowl
  2. Combine all the ingredients in a large bowl and beat well for about 2 minutes
  3. Divide the cake mixture evenly among the cake cases. putting them in bun tins if preferred
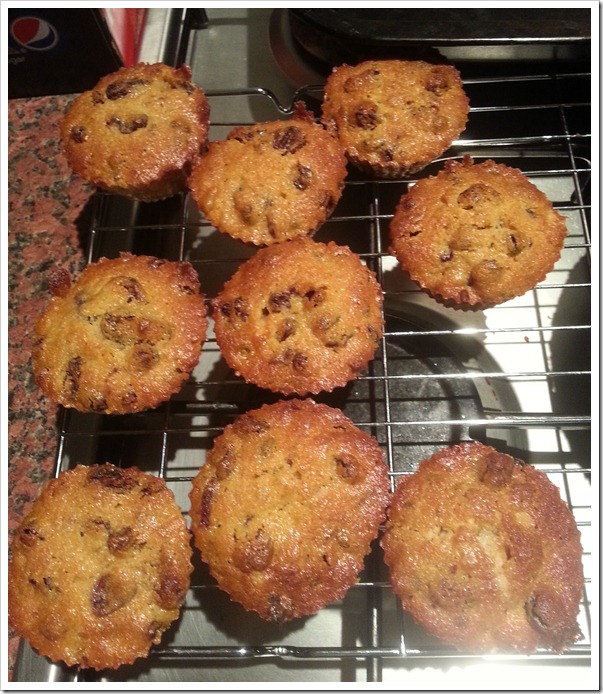
  4. Bake in the pre heated oven for 20-30mins or until golden and springy to the touch
  5. Transfer the cakes to a wire rack and leave to cool


Video: Once again courtesy of the wonderful StaceyRaver’s Youtube

What was Good: OMG the smell! It filled the house with a spicy, mince pie like, winter-y aroma! It literally filled the very bricks of my home with Festive cheer! The cakes themselves are sweet and dense. Dense does not sound very attractive, but trust me, when you expect to devour a light fluffy fairy cake, and the weighty fruit and flavour filled nommable fills your hand, it is a happy moment. The cake itself is packed with so much fruit that it adds a real moist chew with every bite. For those that don’t like mincemeat, Stacey being a prime example, TRUST ME, it is nothing like eating a mince pie! The flavour is aromatic and intense, but the actual flavour of mincemeat is very subtle. Even Stacey is a convert now!

What was Bad: We both felt it lacked a variety of texture or flavour… So we were considering making an icing sugary cinnamony dust for the top? Or even a liquid fondant icing. What do you think? But all in all… Loved these buns of steel!

Would I Make It Again: YES!

Waffle-O-Meter:

WAFFLEWAFFLEWAFFLEWAFFLE

20121124_222304


Reference:

Berry, M (2012) Mary Berry’s Complete Cookbook. 3rd ed. London: Covent Garden Books. P465

Thursday, 22 November 2012

Quick and Easy Sparkling Chocolate Cake in a Mug [How To Make]


Date: 22/11/12

Background: The weather outside is frightful, but in with the cats is delightful, so whilst sat watching Ol’ Lord Shug (Sugar), Eat cake in a mug, in a mug, in a mug.

This pudding is NOT MINE, it is a recipe of the BBC Good Food Show Member Recipe by “Sarah”. This is a recipe I have made on several occasions now, and every time I make it, and listen to the tweaks other members (namely “cake monster) have made, I get a better and better experience! So I have adapted this a little bit, and I hope you enjoy making it! And the best thing is, is that I had all of the ingredients in the store cupboard.

What: Sparkling Chocolate Cake in a Mug


Ingredients:

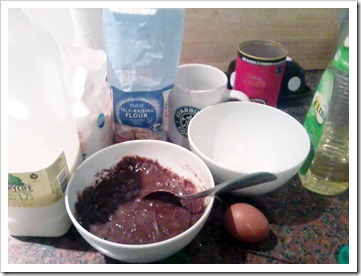
  • 1 coffee mug 2012-11-22 19.45.25
  • 4 Tbsp. Self Raising Flour
  • 4 Tbsp. Caster Sugar
  • 2 Tbsp. cocoa
  • 1 egg
  • 3 Tbsp. milk
  • 3 Tbsp. oil (I use Sunflower/Vegetable)

To Serve:

  • Toffee/Chocolate Sauce
  • Crunchie® Chocolate Bar
  • Vanilla Ice-cream

Method:

  1. Mix together the wet ingredients in a bowl
  2. Pour combined wet ingredients into the dry ingredients and mix thoroughly
  3. Dollop the mixture into the coffee mug
  4. Cook in a microwave at 800W for 3 minutes
  5. Allow to cool for 1 minutes before turning the cake out
  6. Using a rolling pin, bash the Crunchie® bar to break it up into chunks and golden sparkly crumbs
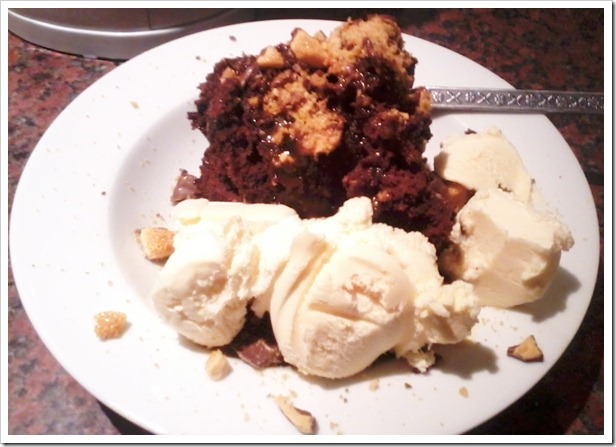
  7. Drizzle the cake with toffee sauce, sprinkle with the broken Crunchie® and serve with scoops of vanilla ice-cream


What was Good: SPEED and SIMPLICITY! I made it all in the last 15 minutes of Eastenders, ready for eating whilst watching Young Apprentice on TV! The ingredients are cheap and, for me anyway, store cupboard staples! This is actually the best attempt of this recipe I have made so far. Aesthetics wise it did not look restaurant worthy, I admit that, because the cake refused to be decanted from the mug in one piece, but all in all wonderful combination of tastes, textures and flavours. The Crunchie® nuggets melt slightly into the cake, and as usual a Hot and Cold Pudding is just what you need when there is a storm blowing a gale outside.

What was Bad: The fact it didn’t look very neat and tidy… Although that doesn’t really bother me when making and baking cakes just for me. It had a nice chocolatey flavour but I felt it was lacking a little bit of depth. But for a cake make in a mug in around 15minutes, who can complain!?

Would I Make It Again?: Yes I would! If desperation calls I always have this recipe to fall back on and hug!

Waffle-O-Meter:

WAFFLEWAFFLEWAFFLEWAFFLE

2012-11-22 19.52.43 (1)

Sunday, 21 October 2012

Jamie Oliver’s- Carrot Cake with Lime Mascarpone Icing [HOW TO MAKE]


Date: 21/10/12

Background: We (Me and Stacey) are proper getting into this baking lark! We are enjoying our weekend free time by baking all sorts of yummy things! I recently brought back all my cookery books from back in Rugby, and one of these was Jamie Oliver: COOK with Jamie- My Guide To Making You A Better Cook. If you hadn’t guessed the recipe for this cake came from this book.

ALSO, with this being the last day of National Baking Week, this amazing cake is our contribution!

What: A Rather Pleasing Carrot Cake with Lime Mascarpone Icing

How Much?: If I am honest it was probably a slightly more expensive cake than I am used to making because I had to buy extra ingredients to those that I normally have in my store cupboard. So I actually ended up spending about £10….


Ingredients:

  • 285g/10oz unsalted butter, softened
  • 285g/10oz light brown soft sugar
  • 5 large free-range/organic eggs, separated
  • Zest and juice of 1 orange
  • 170g/6oz self-raising flour, sifted20121021_140750
  • 1 slightly heaped tsp baking powder
  • 115g/4oz ground almonds
  • 115g/4oz shelled walnuts, chopped, plus a handful for serving
  • 1 heaped tsp ground cinnamon
  • A pinch ground cloves
  • A pinch ground nutmeg
  • 1/2 tsp ground ginger
  • 285g/10oz carrots, peeled and coarsely grated
  • A pinch of sea salt

To decorate:

  • 115g/4oz mascarpone cheese
  • 225g/8oz full-fat cream cheese
  • 85g icing sugar, sifted
  • Zest and juice of 2 limes

Method:

  1. Preheat oven to 180C/350F/Gas Mark 4
  2. Grease and line a 22cm/9inch square cake tin/round equivalent
  3. Beat the butter and sugar together until pale and fluffy
  4. Beat in the egg yolks 1 by 1, add in the orange juice and zest and st ir
  5. Stir in the sifted flour and baking powder
  6. Add the ground almonds, walnuts, spices and grated carrot and mix together well
  7. In a separate bowl, whisk the egg whites and salt until stiff
  8. Gently fold the stiff egg whites into the cake mix (use a metal spoon)
  9. Scoop the mix into a prepared cake tin and cook in a preheated oven for around 50mins until golden and risen
  10. Check the cake using a cocktail stick (or a skewer or in this case a long pronged fork) by spearing the centre of the cake, wait for 5secs and if it comes out clean it is cooked! If slightly sticky put back into the oven
  11. Leave the cake to cool in the tin for at least 10mins, then turn out onto a cake rack for at least an hour
  12. Mix all the icing ingredients together and spread generously on top of the cake and sprinkle with chopped walnuts


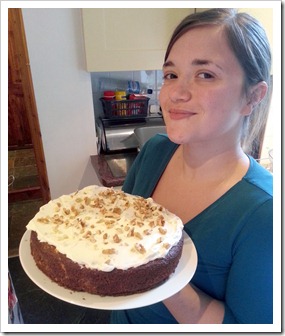
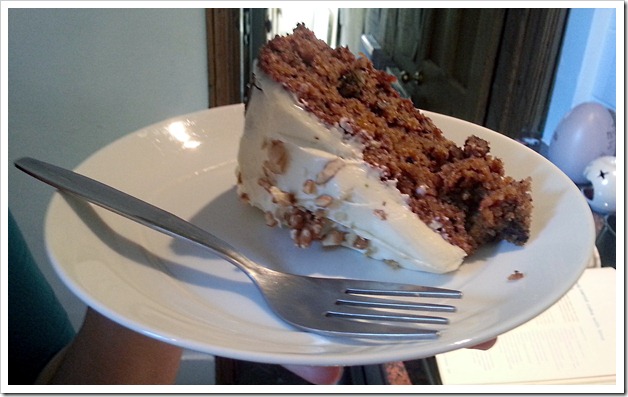
What was Good: *cries with pure happiness*. Out of all the cakes I have ever made, this delicious stupendous utterly luxurious carrot cake was beyond the best. The cake was so so moist, but the texture of the walnuts within it added a surprising crunch and beautiful flavour. I believe the moistness mainly comes from very clever addition of ground almonds, and the airiness from a combination of ingredients (baking powder, SR flour) but also clever technique (whisked egg whites folded in).  There was a really nice amount of carrot within it also. At first I wasn’t sure if the delicious tangy lime mascarpone icing would be too sickly, but with the cake it was a wonderful combination and worked very well together. The flavour was very subtle from the spices, but they came, especially the nutmeg, as a scented after note. I cannot rave about this cake enough. Honestly. No Joke. Thank you Jamie Oliver you beauty!

What was Bad: NOTHING. Literally. Even though we would probably add an extra tsp of spices next time, it is not like the flavour wasn’t there! But we seriously could not think of another improvement. Expect this whole beast to be gone within a few hours!!!

Waffle-O-Meter:

WAFFLEWAFFLEWAFFLEWAFFLEWAFFLE (With more spice it would receive even more waffles!!!!)
20121021_140934